Seasonal Finishing Touches Vol 2 Card by Anjie
Let me share you a step by step guide on how to create an oval easel card featuring the Seasonal Finishing Touches Vol 2 die collection. I hope you enjoy this step by step and don’t forget to share your creations over on our Facebook Group!
For this card you will need:
White cardstock
A paper from the collection
Coordinating coloured cardstock
Lots of flower die cuts
-
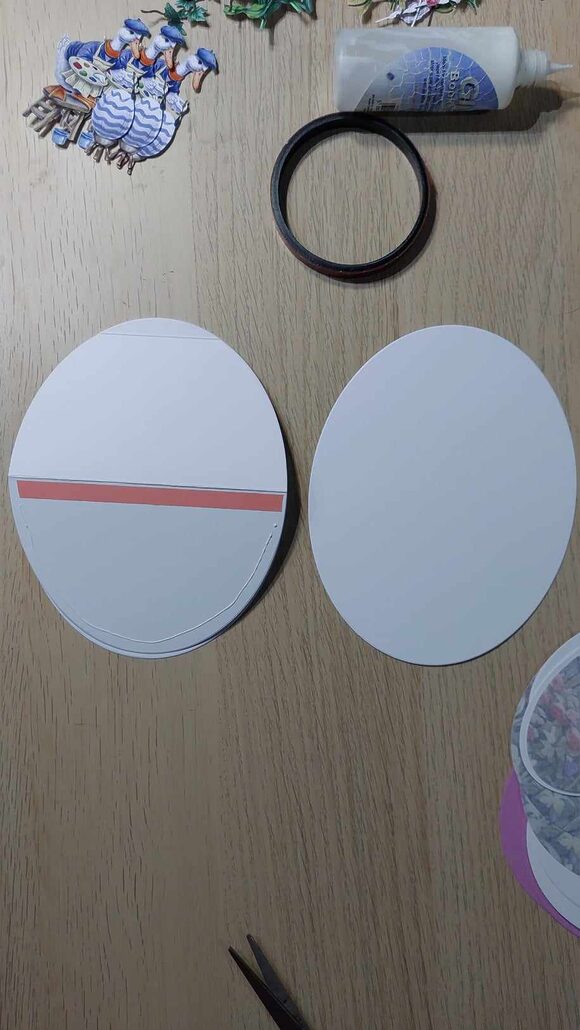
- Step 1, Using the oval dies cut out 3 in white card using the largest die, 2 in the coordinating colour in the next size down, and two in the paper using the next size down.
-
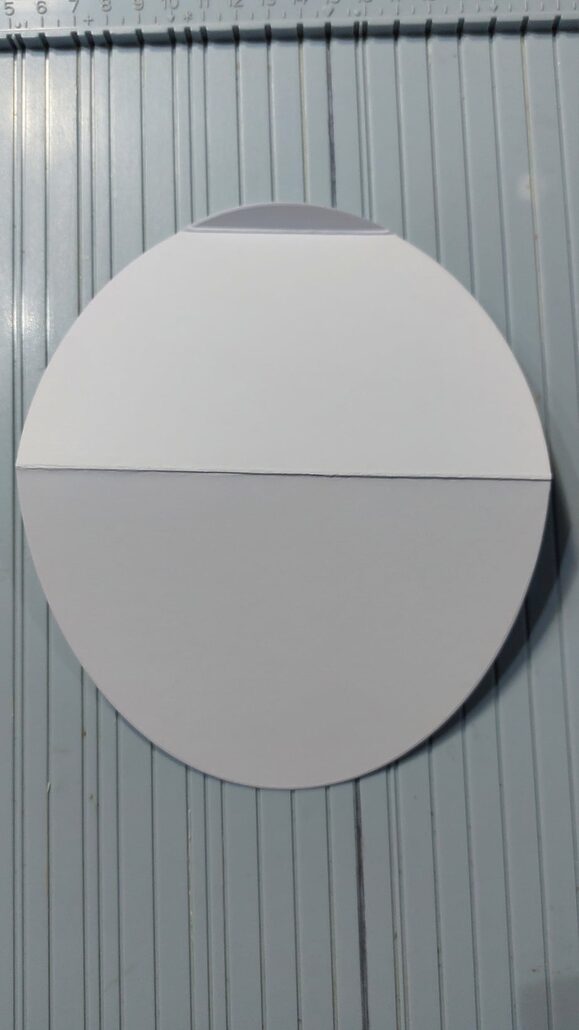
- Step 2, Using a scoreboard take one of the largest white ovals and score a line across the centre and one about 1cm from the top.
-
- Step 3, Glue the 1cm piece you scored to another of the large white die cuts, this will form your card base. Then put glue, or tape, on the bottom part of the card under the centre score line. Stick the 3rd piece of white card over this, taking care not to glue the top part down as this forms your easel.
-

- Step 4, Mat and layer the coordinating cardstock and paper onto the front of the card and on the inside. On the inside you will have to trim some off of the top.

-
- Step 4 b, This is optional but before you glue the inside layers you can use an oval die about 12cm in height and cut from the middle. Just a way of using less card, and no one knows as it’s glued flat to the card.

-
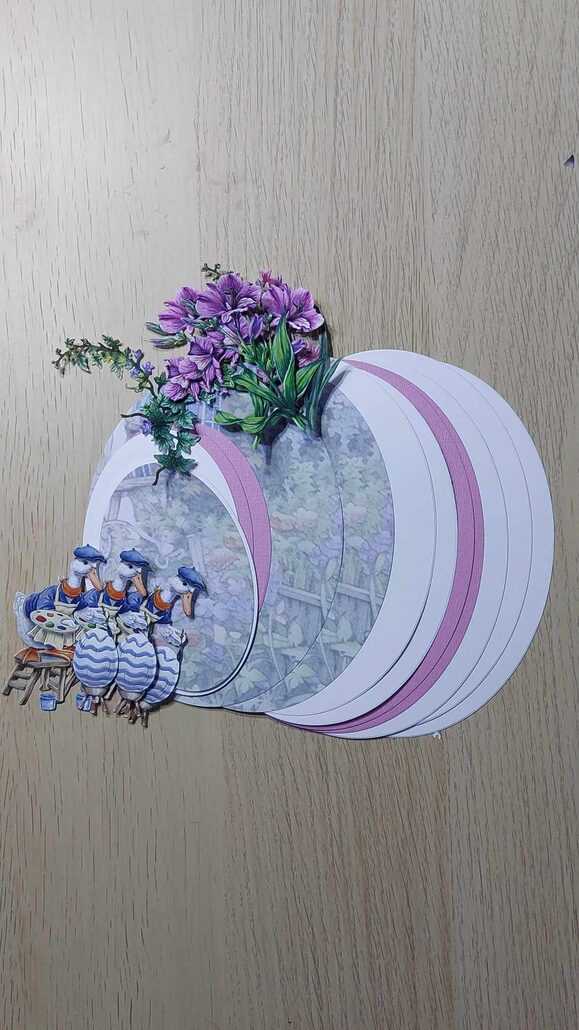
- Step 5, Cut an oval in your coordinating card about 12 cm high. Then the next size down in white card, and the next size in your paper. Mat and layer them and put them on the front of the card using 3D foam. Arrange some of the flowers around the ovals, not forgetting to use some foliage as well.

-
- Step 6, Make some decoupage out of two of the Leonardos you have and glue to the other one using 3D glue gel. Then add him to the centre of the flowers on the topper.

-

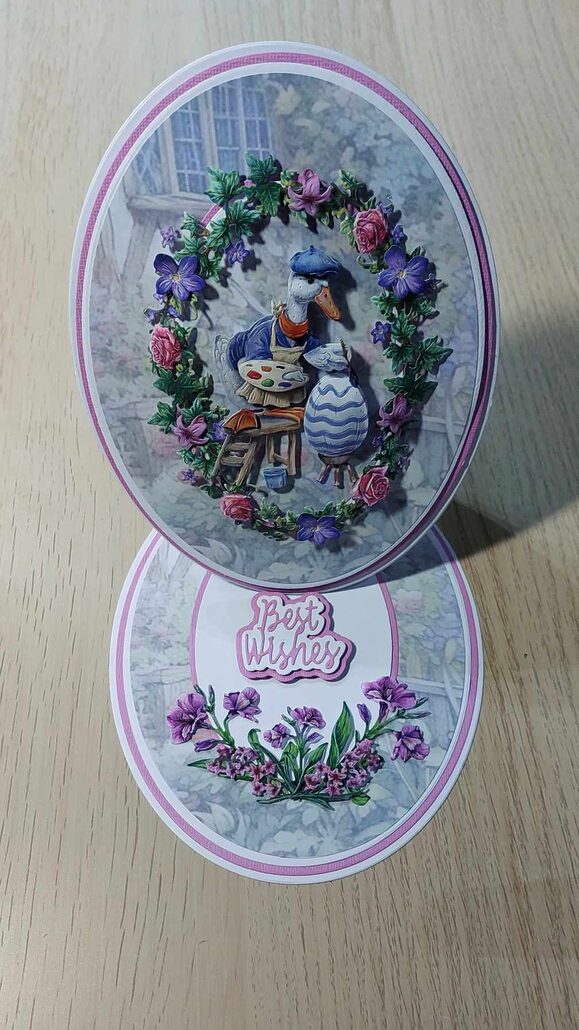
- Step 7, On the inside of the card add a mat using your coordinating colour and white card stock cut two ovals and stick to the inside. Choose a sentiment and mat and layer it using 3D foam tape to stick it down, and add some flowers below the oval for added interest. I used 3D glue gel, but you can glue them flat if you wish.

-
- Step 8, The card is finished and you use the sentiment to stand the easel on.


Leave a Reply
Want to join the discussion?Feel free to contribute!