
ScanNCut: How To Scan and Cut Your Reflections
Here’s a step-by-step guide on how to cut your reflections artwork on your ScanNCut machine. For the purpose of this demonstration, I am using a ScanNCut SDX1200 but the steps will be essentially the same for the other models.
-

- Begin by popping your USB into your computer, selecting the imagery, and printing out your chosen design. Remember to print at actual size in your print settings and I always recommend printing on Pure Print for a high-quality finish to the detail and colour of the artwork. For ScanNCut cutting I prefer working with 140gsm.

-

- Once you have printed your artwork, plug the USB in to the side of your ScanNCut machine and click the Retrieve Data button from the Home Screen.

-

- This will bring up the different options of where you can access files, for USBs select the USB button to the bottom left of the screen.

-

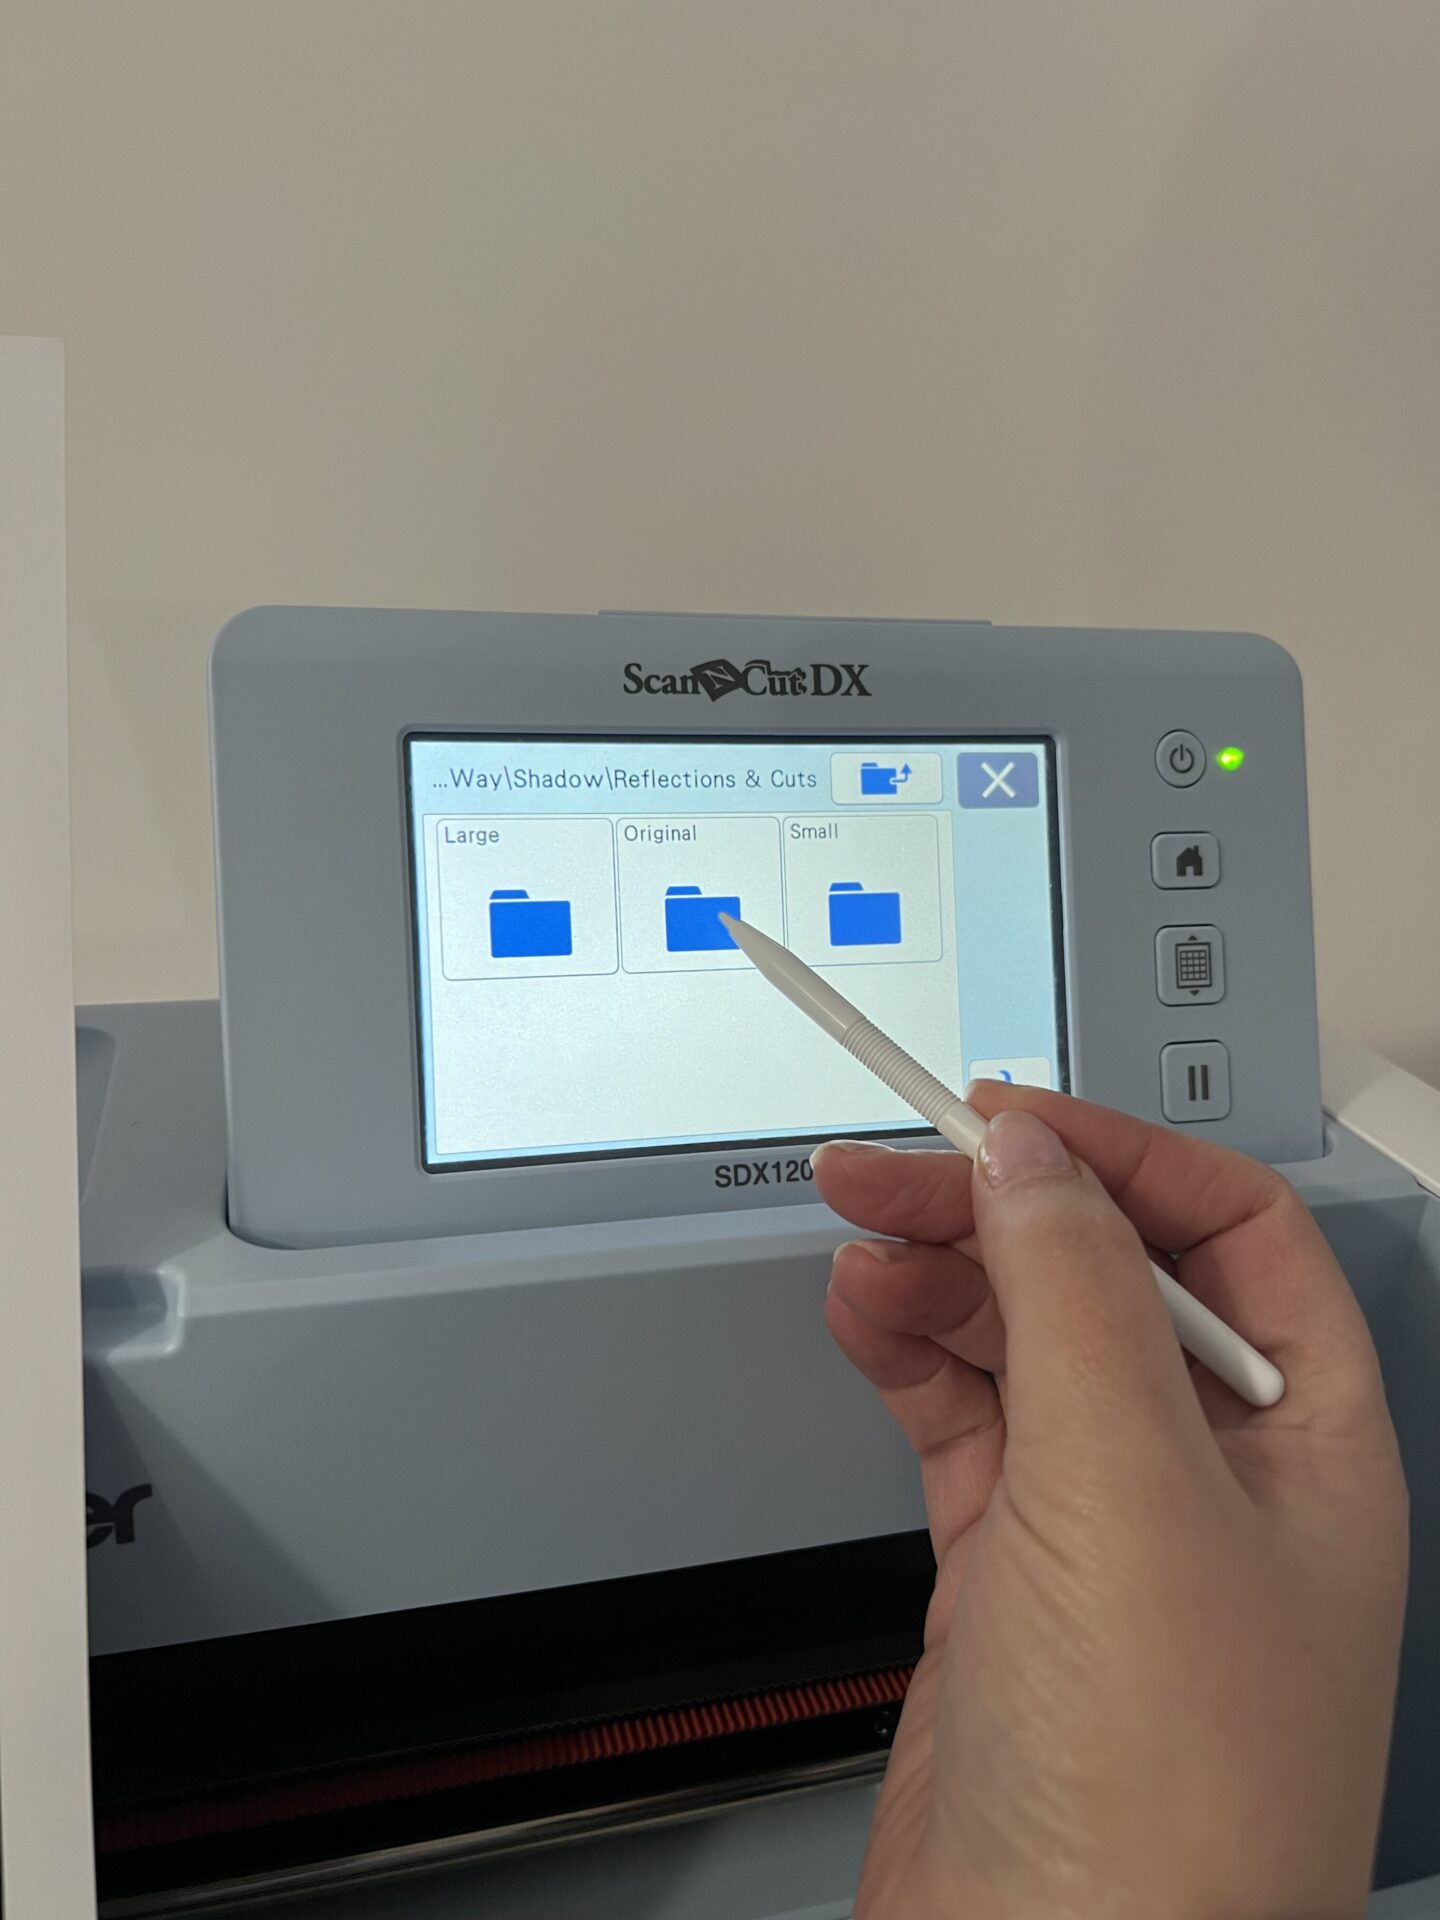
- Next select the collection folder that your reflections artwork was in. If you need a reminder, you will find the collection name and the file name at the bottom of your printed reflection. If the reflection is a Reverse Reflection this will be indicated on the bottom of the printout too.

-
- Choose the type of file you are working with, for the SVG Files select reflections and cuts. The files are ordered alphabetically, and you can scroll down the page using the arrow buttons on screen.

-
- Now choose type of file, in this case we are working with the reflections and cuts.

-
- And now select the size, followed by the cut or decoupage SVG depend on the reflection you are cutting.
-
- A screen will now come up showing you the SVG file. If you are happy, click OK.

-
- This will now put the SVG File on your working mat screen. Before you do anything else you need to group the files together. This allows you to move the cut files simultaneously and also maintain the size ration to one another in you wish to resize them. To group everything together, select the Edit button, followed by the button showing three red boxes.

-
- Next, click to select everything on your mat. You will see red outline boxes appear around all the separate files. Click OK.

-
- From here choose Object Edit.

-
- And choose to Group everything using the group button which looks like a circle and a triangle inside a square and click OK. And click ok again.

-
- Make sure your reflections artwork is securely stuck to your mat, aligning it with the edge and top of the mat rule lines. Now load you mat into the machine, aligning the mat with the bumpers and click the mat feed button located on the area top the right of the screen.

-
- Once your mat is loaded, choose the scan function and press start. The machine will take the mat into the machine and scan it, producing a colour image on the screen of what is on your mat.

-
- Now we need to align the SVG File with the artwork. To do this, drag and drop the file so that the red outline of the SVG File aligns with the black box that surrounds the reflections artwork.

-
- You can further check the alignment by clicking the Edit button, followed by the magnifying tool and magnifying up to 400% should you wish. Use the arrows on the screen to nudge the SVG file in to place, click ok.

-
- At this point you can choose to delete any of the elements you do not wish to cut. Go to object edit to ungroup, click ok and then you can either use the stylus to select any element – clicking the delete icon or you can choose to use the arrows on screen to cycle through the elements too. I like to delete to outer alignment box to save you cutting the same rectangle in to your mat over and over again, prolonging the life of your mats.

-
- Now we are ready to cut, click ok followed by ok and then “please select” cut.

-
- Click start and on the SDX models the blade carriage will bring the auto blade to the mat to measure the depth, and then move to measure the depth of the material you are cutting and adjust the depth automatically to suit.

-
- Once cut, click the mat feed button to unload the mat and gentle peek your cuts away from your mat.


Thanks for this. So much easier than watching a video where you need to keep pausing it to make notes.
i have purchased some highlight craft SVG downloads,busy bunnies,toadally and something to tell you. they dont have a USB and i cant figure out how to cut them out on my scan and cut so that they are clear, they cut with the fuzzy edges around them, im fairly new to this so am a bit lost. can someone help me ……… many thanks
Hi Jennie, thank you for your message. To cut your reflection artwork using your SVG Files you first need to print the reflections at 100%/ actual size. Then, using your ScanNCut you use the SVG Files matching the reflections to cut them out, group the SVG Files, fix your reflections to your mat, scan your mat, then align the red box around the files with the black box around the artwork and cut.
We have a video tutorial on our YouTube channel – https://youtu.be/rG2qifE6Yrc?si=QiGDIMZsOvm7Xo1I
Was very apprehensive to use my USBs with my scan and cut until I saw this tutorial. I did have to go over a it a few times as have a menopause brain and some things didn’t sink in. That’s nothing to do with the tutorial totally down to me. I am now addicted to cutting out with my scan and cut and have been using it at every opportunity. I feel that with your educational information I am going from strength to strength using my scan and cut and canvas workspace. So thank you