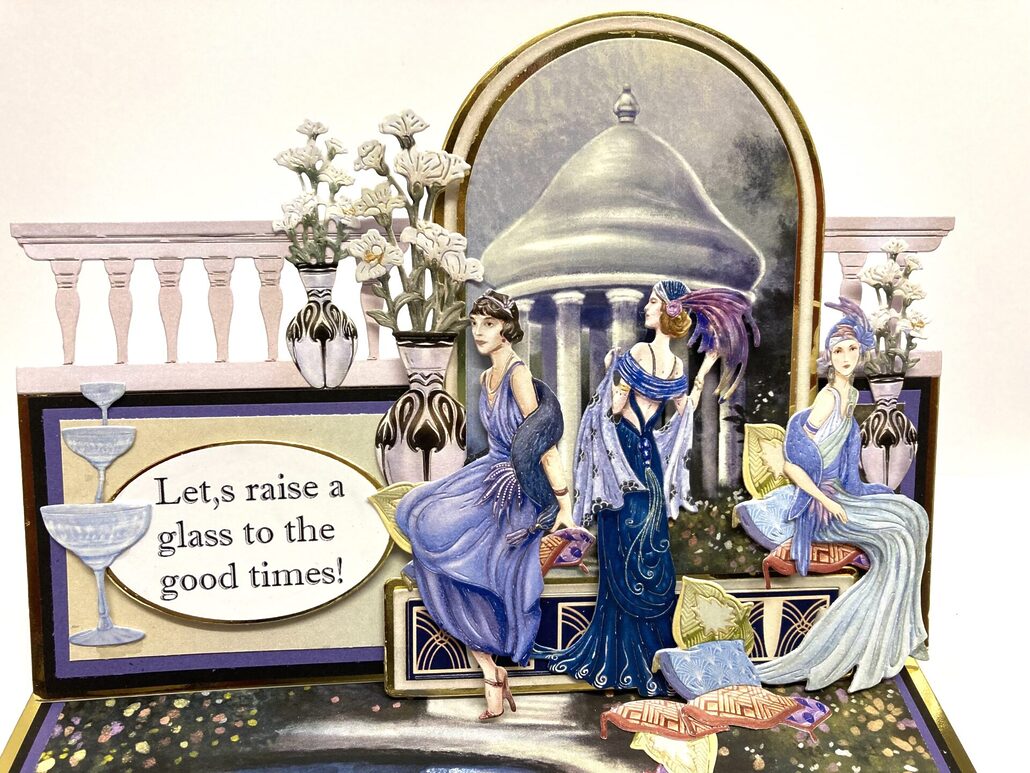
Kath’s Easel Card with A Night To Remember
Hello crafters I am back today with a tutorial for you using the beautiful Art deco style ITS a night to remember collection I love this collection but I do say that about everyone collection lol .
For this card you will need
ITS A night to remember collection garden scene artwork large scene and smaller scenes
A4 Gold card
A4 black card
A4 purple card
Scoreboard and scoring tool
Guillotine
Foam pads /glue
-
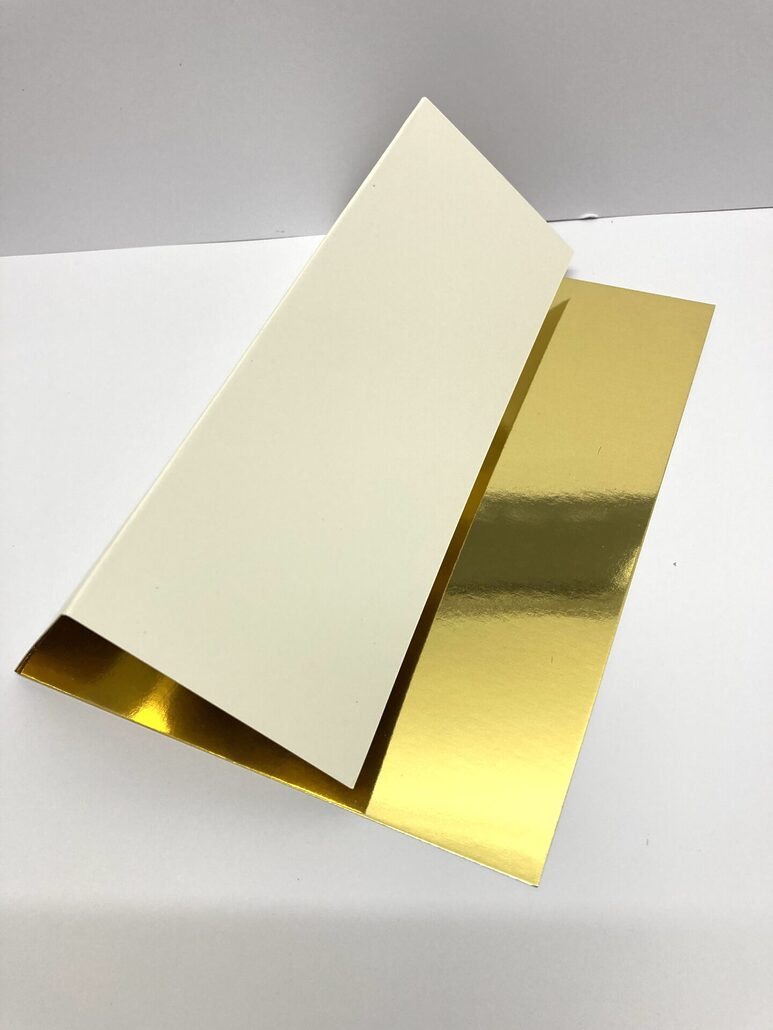
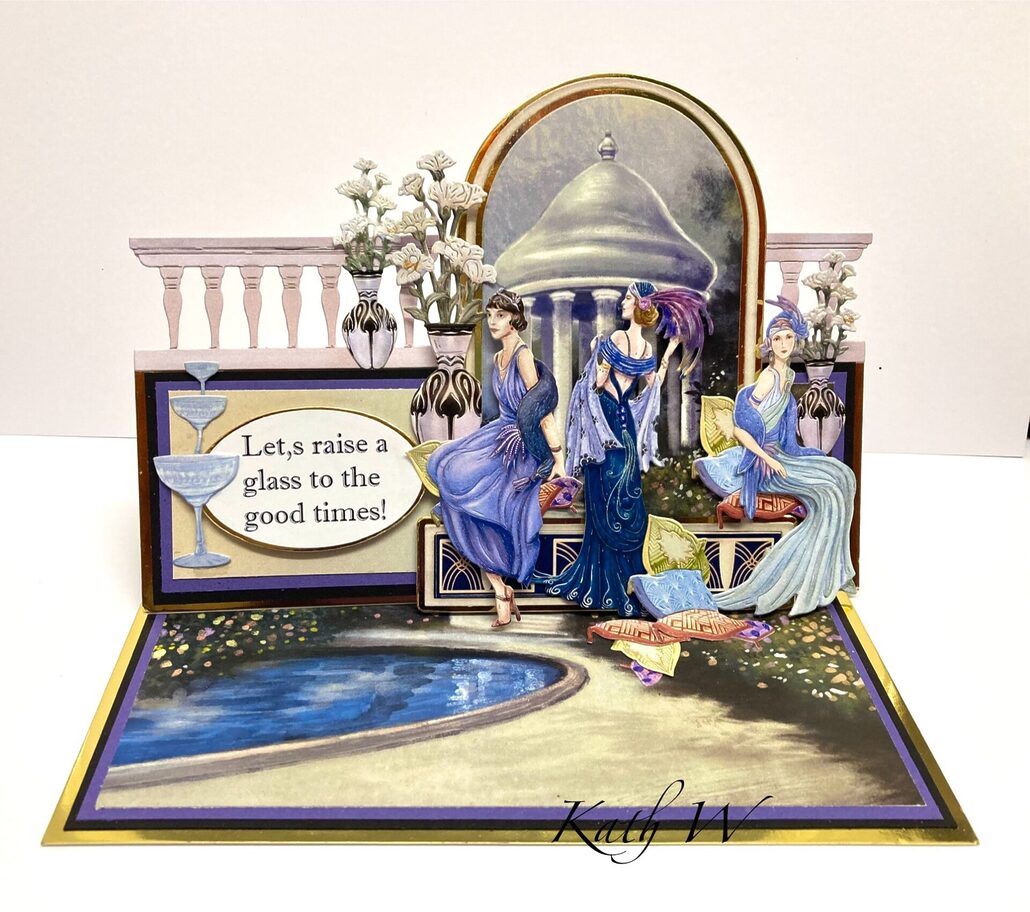
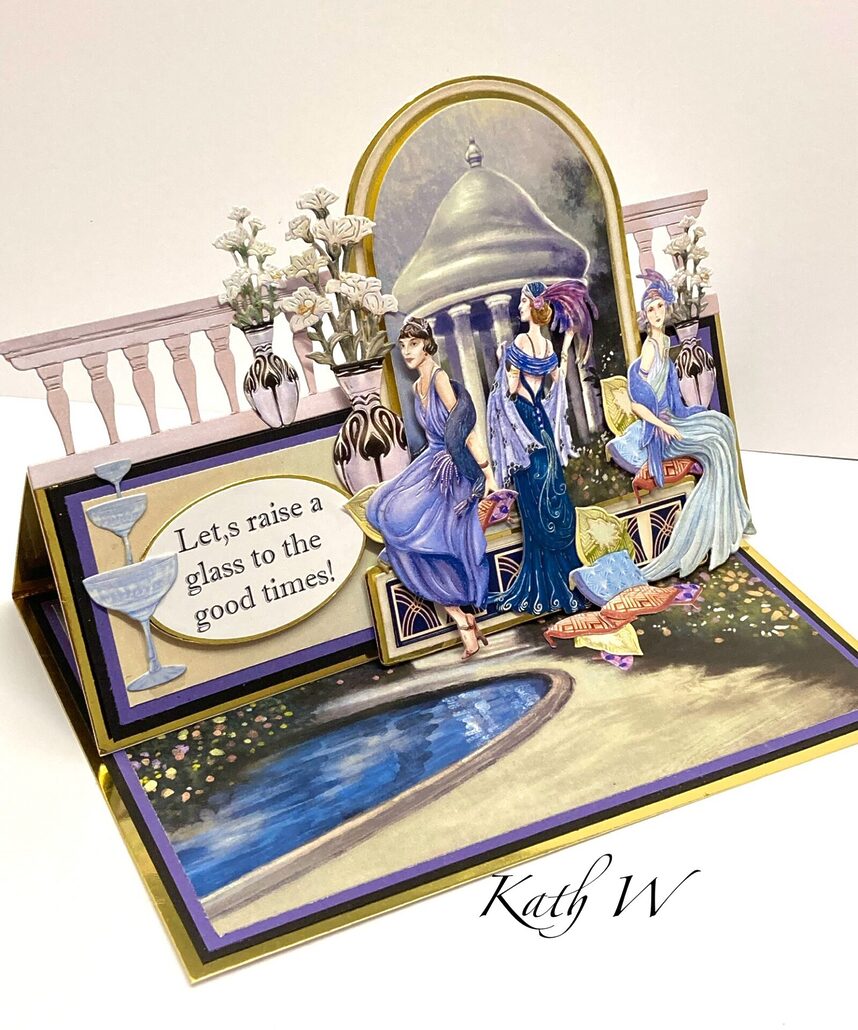
- Using a Sheet of gold mirror card Score and fold into a tent fold style card then score and fold the front of the card again lengthways to make an easel card the gold should be the front. Cut another piece of gold card cover the white part of the easel now the card should be all gold at the front keep the back white this is where you can write your message
-
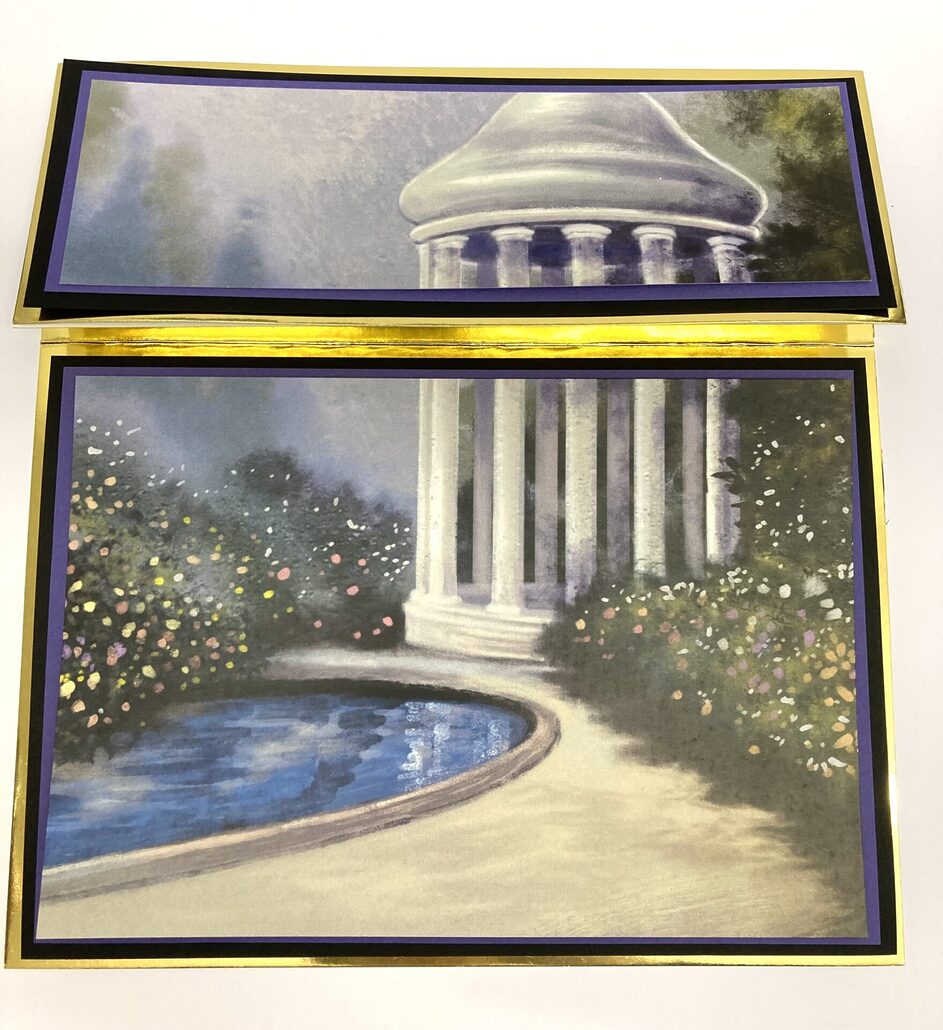
- Starting with the black card cut mat and layers the way I do this is measure the card area where you need to cover then decrease the size by a quarter of an inch for each layer do the same to the purple and the larger garden scene. Glue the layers flat on the bottom part of the easel card as when you fold the card down it should lie flat you can add foam pads to layers on the top part of the easel to elevate it a little
-
- Cut all your reflections pieces ready (I cut 2 of each and glue on top of each other to strengthen )you will also need to cut a gold layer from the outer die from Art deco arch and the middle of the arch is cut from the smaller size scene. Add foam pads to the bottom part of the gold arch align with the bottom of the easel and Press in place.
-

- Glue the balconies into place by running a small amount of glue to the bottom edges hold in place until adhered. Lie your card flat attach all your other pieces in place using glue gel or foam pads. Add a sentiment ( I created mine in MCS) to the right side as in the photo.
-

- Take your cushion pieces glue two together to strengthen (these will be the stopper) score across the bottom part add a small amount of glue to the back where you have scored push the easel up into the position you would like it to stand add the cushion to the bottom of the card hold in place for a few minutes for the glue to set the cushions should lie flat when you need to close the card
I hope you enjoy this tutorial and we would love to see all your creations in our Facebook group’s happy crafting from Kath W 😊


Leave a Reply
Want to join the discussion?Feel free to contribute!