
Floating Teacup Tutorial Using Flower Of The Month Carnation & Rhododendron by Kath W
You will need:
- Craft Master teacup & saucer templates
- Patterned A4 card stock x2
- Plain coloured card stock x 1
- Two Red Robins Flower Of The Month Rhododendron & Carnation Build A Bouquet dies
- Scissors
- Scoreboard
- Construction acetate
- Glue gel
- Red liner tape
-

- Step 1 Print designs onto Craft Master 250GSM pure print. My designs were from Flowers & Faux Finishes artwork, background 42 and 49.

-
- Die-cut flowers so they’re ready to use.

-
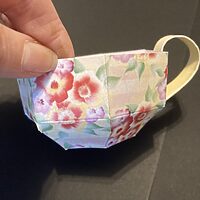
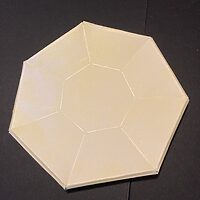
- Step 2 Make up the teacup and saucer according to the directions, these are available when you purchase the templates from Highlight Crafts website.
-
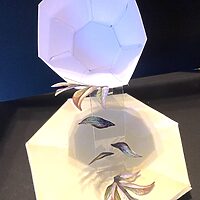
- Step 3 Cut a piece of construction acetate to 1“ x 5”, score the top and bottom at 1”, and attach red liner tape to both ends (note the tape is positioned on opposite sides).

-
- Attach one end under the saucer, and one to the bottom of the cup.

-
- Step 4 Cut another piece of construction acetate down to 4 3/4”x 1“, score one end at 1” and the other at 1/2”. Attach the 1” side to the underneath of the cup, and the other side to the saucer using red liner tape.

-
- Step 5 Attach red liner tape to the centre of the acetate running down from the cup, this will secure the first lot of flowers.
-
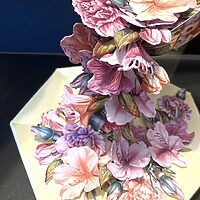
- Step 6 Start by attaching the leaves from the Rhododendron die-cuts, then add flowers and buds to the inside of the teacup.

-
- Step 7 Add flowers down the front of the cup, and around the saucer, using 3D glue gel, tuck in leaves and buds to add interest.
-
- Your project is now complete!

I hope you enjoy this tutorial! We would love to see your version on our Facebook pages! Happy crafting from Kath W😊


Leave a Reply
Want to join the discussion?Feel free to contribute!